
Appearance
Installation
Installing Faker Studio is straightforward and follows the same workflow as any other WordPress plugin. Faker Studio Lite (free, hosted on WordPress.org) installs in a single click and needs no license. Faker Studio Premium is distributed as a downloadable ZIP and requires a license key. This guide covers both.
Development Environments Only
Faker Studio is designed for development, staging, and testing environments. Do not install it on production sites that contain real user data. Generating bulk content on a live site can overwrite data, fill your database with test entries, and confuse real users. Always use Faker Studio on a separate local or staging installation.
Requirements
Before you begin, verify that your environment meets the minimum requirements. Faker Studio will not activate if these conditions are not met.
| Requirement | Minimum Version | Notes |
|---|---|---|
| WordPress | 6.0 | REST API features and block editor support required |
| PHP | 7.4 | The codebase uses features available from PHP 7.4 onward |
| User Role | Administrator | The manage_options capability is required for all Faker Studio operations |
| License Key | Premium only | Faker Studio Lite needs no license at all. See License documentation for Premium. |
Installing Faker Studio Lite (Free)
Faker Studio Lite is hosted on the official WordPress.org Plugin Directory, so installation is just like any other free plugin — no account, download, or license key required.
From your WordPress admin dashboard:
- Navigate to Plugins > Add New Plugin.
- Search for "Faker Studio".
- Click Install Now next to "Faker Studio Lite", then click Activate.
That's it — a new Faker Studio menu item appears in the WordPress admin sidebar, and you can start generating content immediately. There is no license screen and no first-time activation step.
If you prefer to install manually (for example, on a server without direct plugin-search access), download the ZIP from the Faker Studio Lite page on WordPress.org and follow the manual upload steps below — the process is identical to Premium, just without the license step.
Want more?
Faker Studio Lite covers the core generation workflow: up to 10 posts per run across up to 5 custom post types, full custom-field detection, LoremFlickr images, and bulk delete. Faker Studio Premium removes those limits and unlocks Taxonomy/User/Comment generation, AI-powered content, additional image providers, editable templates with cloud sync, history with rollback, and cross-CPT relational fields. Throughout this documentation, Premium-only features are marked with a "Premium" label.
Installing Faker Studio (Premium)
The sections below describe the three ways to install Faker Studio Premium, plus the license activation step that Premium requires on first run.
Method 1: Upload via WordPress Admin (Recommended)
The simplest way to install Faker Studio Premium is through the WordPress plugin upload interface. This method handles file extraction and placement automatically, so you do not need FTP access or command-line tools.
Start by downloading the latest release ZIP file from your Faker Studio account. The file will be named something like faker-studio-premium-1.2.0.zip. Do not extract the ZIP — WordPress expects the compressed archive.
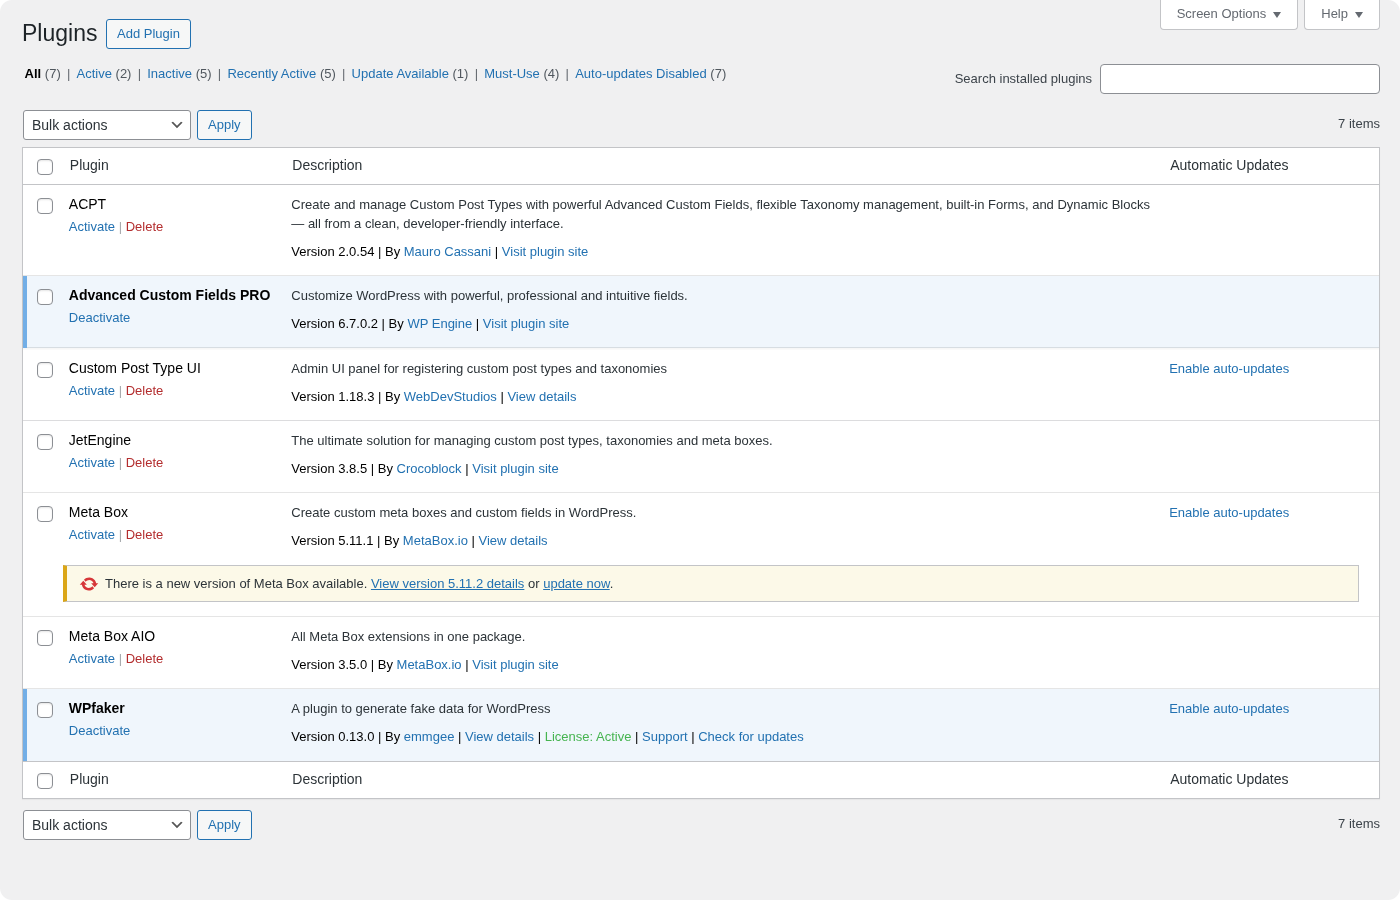
In your WordPress admin dashboard, navigate to Plugins > Add New and click the Upload Plugin button at the top of the page. Click Choose File, select the ZIP file you just downloaded, and then click Install Now. WordPress will extract the plugin files into wp-content/plugins/faker-studio/ and display a success message. Click Activate Plugin to enable Faker Studio Premium immediately.
After activation, you will see a new Faker Studio menu item in the WordPress admin sidebar. The first time you open it, the plugin will display a license activation screen — see the First-Time Setup section below.
Method 2: Manual Upload via FTP or SFTP
If you prefer to manage plugin files directly — for example, on a remote server without WordPress admin access to the plugin uploader — you can install Faker Studio manually via FTP or SFTP.
Download the latest release ZIP from your Faker Studio account and extract it on your local machine. You should now have a folder called faker-studio containing faker-studio.php and the rest of the plugin files.
Using your FTP or SFTP client, connect to your WordPress server and navigate to the wp-content/plugins/ directory. Upload the entire faker-studio folder there, so the main plugin file ends up at wp-content/plugins/faker-studio/faker-studio.php.
Once the upload is complete, go to Plugins in your WordPress admin dashboard. Find "Faker Studio" in the plugin list and click Activate. If the plugin does not appear, double-check that the folder structure is correct and that all files were uploaded successfully.
Method 3: Composer
For developers using Composer-managed WordPress installations (such as Bedrock or similar setups), Faker Studio Premium can be installed as a Composer package.
bash
composer require emmgee/faker-studioAfter Composer finishes installing the package, activate the plugin through your WordPress admin dashboard or via WP-CLI:
bash
wp plugin activate faker-studioComposer Repository
If the package is not available on Packagist, you may need to add a custom repository source to your composer.json. Refer to the Composer documentation for instructions on adding VCS repositories.
First-Time Setup
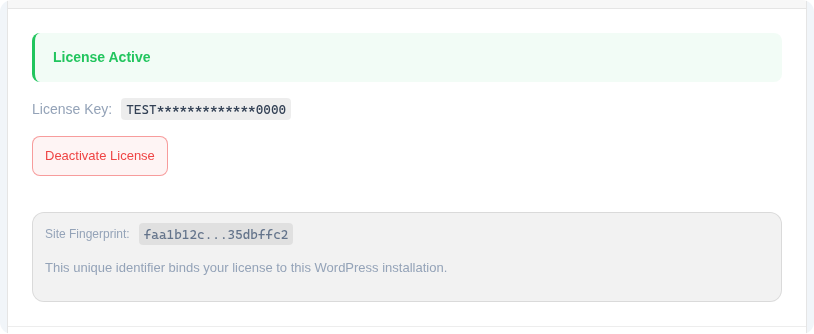
When you activate Faker Studio Premium for the first time on a new WordPress installation, the plugin displays a license activation splash screen before granting access to any features. This screen appears instead of the regular Faker Studio dashboard and prompts you to enter your license key.
Enter your license key in the format XXXX-XXXX-XXXX-XXXX and click Activate License. The plugin will send your key and a site fingerprint (a hash of your WordPress installation's unique identifiers) to the Faker Studio license server for validation. If the key is valid and has not expired, the activation succeeds and the full Faker Studio dashboard becomes available.
Faker Studio offers a yearly license that grants access to all features for 12 months, with renewal available before or after expiration. For complete details on license activation, deactivation, and the site fingerprint system, see the License documentation.
Optional: AI Field Detection (Premium)
Faker Studio's built-in pattern matching handles the vast majority of field names automatically. However, if your project uses unusual or domain-specific field names that pattern matching cannot resolve, Premium users can enable the optional AI-powered detection tier. This section does not apply to Faker Studio Lite, which does not include AI detection.
Navigate to Faker Studio > Settings and scroll to the "AI-Powered Field Detection" section. Enable the toggle, select your preferred AI provider (Google Gemini, Anthropic Claude, or OpenAI GPT), enter your API key, and click Test Connection to verify that the key works. Save your settings. From this point on, Faker Studio will consult the selected AI provider as a fallback when its own pattern matching produces no confident result.
For a deeper look at how the two-tier detection system works, see the AI Settings and Field Detection documentation.
Updating Faker Studio
Automatic Updates
When a new version of Faker Studio is released, the plugin's built-in update checker will detect it and display an update notification in your WordPress admin dashboard, just like any other plugin update. Click Update Now to install the latest version. Your settings, templates, and generation history are preserved across updates.
Faker Studio Lite updates through the standard WordPress.org update mechanism, exactly like any other plugin listed there.
Manual Updates (Premium)
If automatic updates are not available or you prefer manual control, download the latest release ZIP from your Faker Studio account. Then follow the same steps as the initial installation: go to Plugins > Add New > Upload Plugin, select the new ZIP file, and install it. WordPress will prompt you to replace the existing version. Click Replace current with uploaded to complete the update.
Back Up Before Updating
While Faker Studio preserves all data across updates, it is always good practice to back up your database before updating any plugin — especially on staging environments with important test configurations or saved templates.
Troubleshooting
Plugin Does Not Appear After Upload
If you uploaded the plugin but it does not show up in the WordPress plugin list, the most common cause is an incorrect folder structure. The main plugin file must be located at wp-content/plugins/faker-studio-lite/faker-studio.php (Lite) or wp-content/plugins/faker-studio/faker-studio.php (Premium). If the ZIP extraction created a nested folder, move the inner plugin folder up one level so it sits directly inside plugins/.
PHP Version Error on Activation
If WordPress shows a "requires PHP 7.4" error when you try to activate Faker Studio, your server is running an older PHP version. Check your current PHP version by navigating to Tools > Site Health > Info > Server in WordPress, or by running php -v on the command line. Contact your hosting provider to upgrade to PHP 7.4 or higher, or switch to a newer PHP version if your server supports multiple versions.
WordPress Version Compatibility
Faker Studio requires WordPress 6.0 or higher. If you are running an older version, update WordPress before attempting to activate the plugin. You can check your current version at Dashboard > Updates or at Tools > Site Health > Info > WordPress.
Permission Denied Errors
Faker Studio requires the manage_options capability, which is granted to the Administrator role by default. If you see permission errors, make sure you are logged in as an Administrator. If you are using a custom role management plugin that has modified the Administrator role's capabilities, verify that manage_options is still assigned.
Database Tables Not Created
Faker Studio automatically creates three database tables on activation (in both Lite and Premium):
{prefix}faker_studio_history— Tracks all generated content for cleanup and history features{prefix}faker_studio_templates— Stores saved template configurations{prefix}faker_studio_field_detections— Caches field type detections to avoid repeated pattern matching and AI calls
If these tables were not created (which can happen if the activation hook was interrupted or if database permissions are restrictive), try deactivating and then reactivating the plugin. If the problem persists, check that your WordPress database user has CREATE TABLE privileges.
Uninstalling Faker Studio
Before uninstalling, it is important to understand what gets removed and what stays behind. By default, deactivating and deleting Faker Studio removes the plugin files but does not delete generated content. Any posts, terms, and users that Faker Studio created will remain in your WordPress database. If you want to clean up generated content before uninstalling, use the History screen to bulk-delete everything Faker Studio created.
Faker Studio also offers an option to automatically delete its tracking data when the plugin is deactivated. To enable this:
- Navigate to Faker Studio > Settings
- Enable Delete History on Deactivation
- Save settings
- Deactivate the plugin from Plugins
Irreversible Data Deletion
When "Delete History on Deactivation" is enabled, the faker_studio_history and faker_studio_templates database tables are dropped on deactivation. This means all generation history and saved templates will be permanently lost. The faker_studio_field_detections cache table is preserved until the plugin is fully uninstalled. Make sure to export any templates you want to keep before deactivating. This setting does not delete the generated posts, terms, or users themselves — only Faker Studio's internal tracking data.
After deactivating, you can safely delete the plugin from the WordPress plugin list. To reinstall later, simply follow the installation steps above. Faker Studio will recreate its database tables on the next activation.